MICROBEBIO® PRODUCTS
FOR GROWING ORGANIC RICE PLANTS
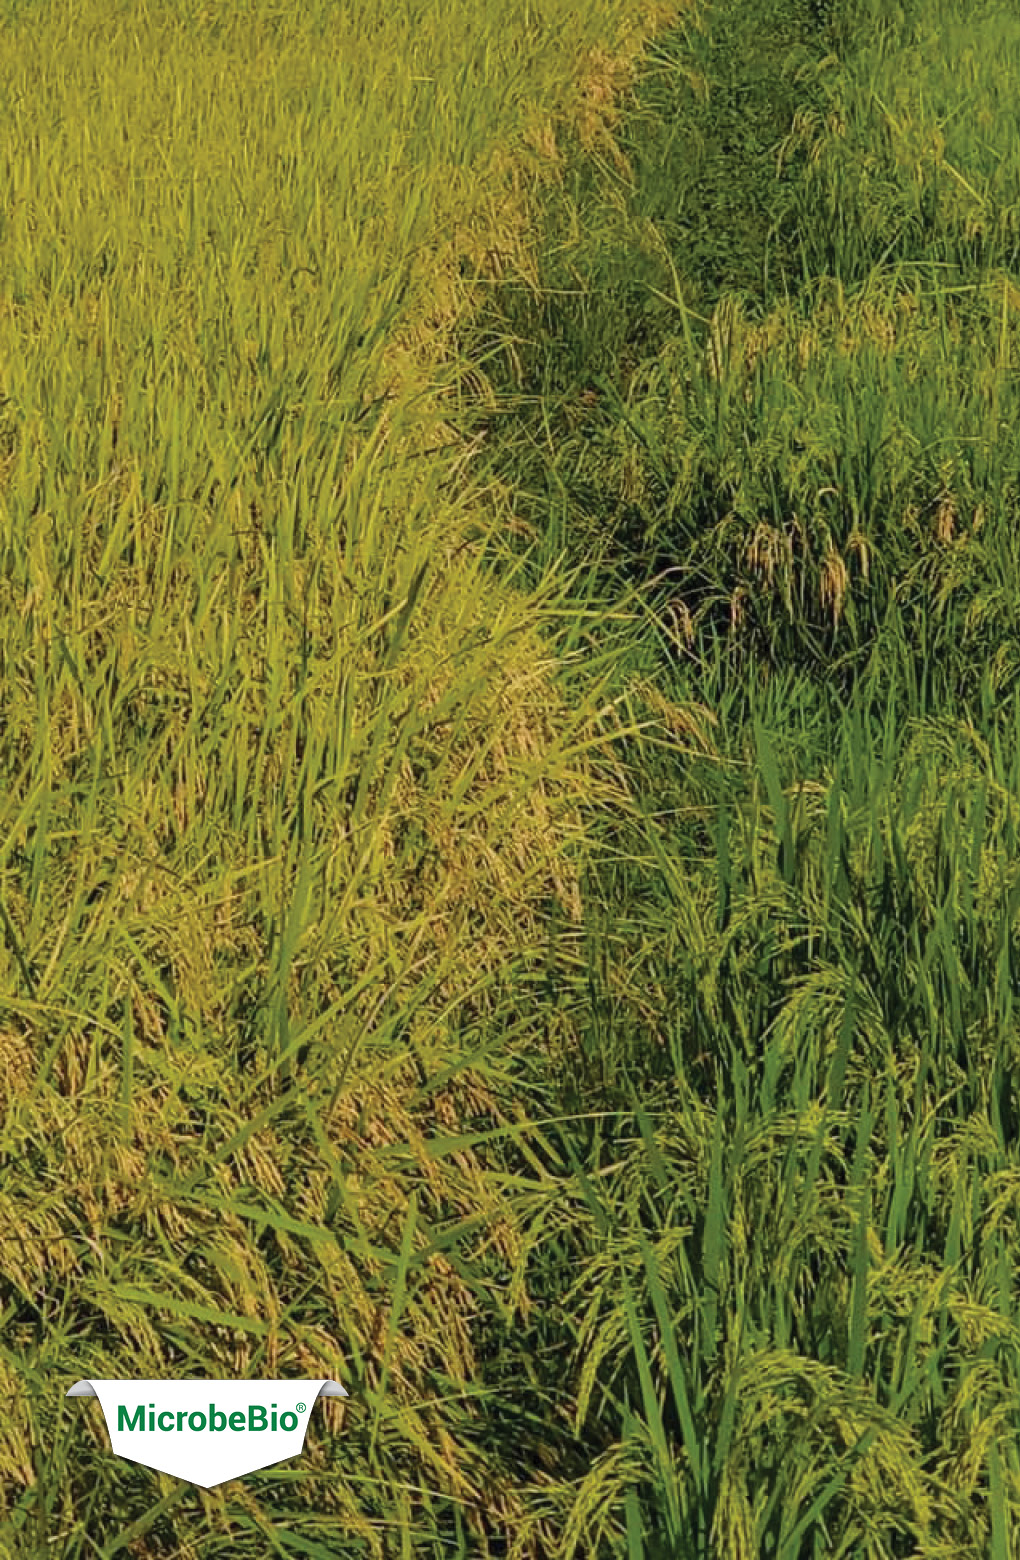
I. RICE PLANT GROWTH STAGES
There are tons of rice varieties in the market that the farmers should have different methods for growing rice plants. Therefore, the identification of the rice plant growth stages will help the farmers to prepare a reasonable plan for each season.

| GROWTH STAGES | BBCH SCALES | IDENTIFICATION | CONVENTIONAL SIGNAL | LEAF POSITION | |
| Germination | 05 | Emergence of coleoptile | 80% | SO | |
| Transplanting | 13 | The emergence of Therprophyll from coleoptile | 80% | TR | |
| Emergence tillering | 21 | Collar formation on Leaf 3 on the main stem | 50% | ET | |
| Pre-tillering | 23 | Collar formation on Leaf 6 on the main stem | 50% | AT | |
| Tillering | 26 | Collar formation on Leaf 13 (flag leaf) on the main stem | 50% | MT | |
| Panicle Initiation | 30 | Panicle development has initiated | 50% | PI | 4th leaf |
| Anthesis (flowering) | 32 | Panicle exertion from a boot, a tip of panicle is above the collar of flag leaf | 50% | PF | 3rd leaf |
| Ripening | 35 | At least one caryopsis on the main stem panicle has elongated to the end of the hull | 50% | SD | 2nd leaf |
| Milk stage and soft dough stage | 39 | At least one caryopsis on the main stem panicle is elongating to the end of the hull | 50% | ME | Flag leaf |
| Hard dough stage | 58 | At least one grain on the main stem panicle has a yellow hull | 80% | HE | |
| Maturity | 75 | At least one grain on the main stem panicle has a brown hull | 50% | AR | |
| Harvest | 88 | All grains which reached R6 have a brown hull | 80% | HA | |
The critical rice plant growth stages:
- Germination: Nutrition from the endosperm can supply the growing embryo for about 3 weeks (~20 days). In the embryo, two primary structures grow and elongate the radicle (first root) and coleoptile (protective covering enveloping the shoot). As the radicle and coleoptile grow, they apply pressure to the inside of the hull. Eventually, the hull weakens under the pressure, and the pointed, slender radicle and coleoptile emerge. The appearance of the radicle and coleoptile loosely defines the completion of germination
- Vegetative Phase: Seedling development begins when the primary leaf appears shortly after the coleoptile is exposed to light and splits open at the end. The primary leaf elongates through and above the coleoptile. The primary leaf is not a typical leaf blade and is usually 1 inch or less in length. The primary leaf acts as a protective covering for the next developing leaf. As the seedling grows, the next leaf elongates through and past the tip of the primary leaf. Continuing to grow and develop, the leaf differentiates into three distinct : arts: the sheath, collar, and blade.
- Reproductive Phase: The remaining leaves of the plant develop, internode elongation and stem formation continue, and panicle formation begins. When cells first begin actively dividing between the growing point or apical meristem, the process is called panicle initiation (PI).
- Maturity: Maturity occurs when carbohydrate is no longer translocated to the panicle. At this time, the endosperm of all grains on the panicle of the main stem is firm. Most grains are some shade of brown and the grains in the lower quarter of the panicle are the only ones with a greenish tint.
II. GROWING METHODS
LAND PREPARATION:
Step 1: Well-prepared field and controls weeds.
Land preparation is important to ensure that the rice field is ready for planting. A well-prepared field controls weeds, recycles plant nutrients, and provides a soft soil mass for transplanting and a suitable soil surface for direct seeding. Land preparation covers a wide range of practices from zero-tillage or minimum tillage which minimizes soil disturbance through to a totally ‘puddled’ soil which destroys soil structure.
It typically involves:
- Plowing to “till” or dig-up, mix, and overturn the soil
- Harrowing to break the soil clods into smaller mass and incorporate plant residue.
- leveling the field. Initial land preparation begins after your last harvest or during the fallow period. This is important for effective weed control and for enriching the soil. Generally, it will take 3−4 weeks to prepare the field before planting.
Golden apple snails management.
Golden apple snails eat young and emerging rice plants. They cut the rice stem at the base, destroying the whole plant. So, the golden apple snail management is critical during:
- The first 21 days of direct-seeded crops.
- The first 10 days of transplanted crops.
COMMUNITY-BASED SNAIL MANAGEMENT
- To best control the snail, communities should work together to reduce snail numbers in their area.
- Conduct mass snail and egg collection campaigns, involving the whole community, during land preparation and planting or crop establishment.
- Keep fields drained as much as possible during the vulnerable stages of the rice plant (below 30 days) or transplant 25−30 day old seedlings from low-density nursery beds.
- Some recommended management:
- Using biological microorganisms management.
- Using biological controls (natural predators)
- Using cultural controls such as:
- Handpick snails
- Water management
- Toxic plants
- Prevent field entry
- Transplanting
- Using traditional chemical controls.
Step 2: Flatten field
Good land flattening is best achieved using laser-assisted leveling.
GERMINATION:
Step 1: Sunbathing of the seed (exposure of the seed to sunlight) should be done at least one or two days before seed dipping.
Step 2: The size of the seed is highly correlated to the growth of young plants. The sprouts and roots of unhealthy seeds do not develop well and die easily, even from minor changes in temperature and conditions. One needs to select large and solid seeds, endowed with sufficient carbohydrates (energy) and nutrients for healthy plants. Eliminate spoiled (deformed, light, or small) seeds and select only solid, robust ones. This will make the quality of seeds even and will result in more regular germination and healthier growth of plants. The sorting method recommended is as follows:
- Sort the seeds using wind or screen in combination with sunning to eliminate any empty or small grains and foreign substances.
- After placing the seeds in a bowl with clean water, shake them softly to remove any empty grains or foreign substances
Step 3: Soaking.
Many varieties have a dormancy period where germination levels are low. Several treatments can be used to break dormancy and improve seed growth. Note: Pre-germinated seeds cannot be sown through a drill seeder.
- Expose seeds to high temperatures (40−42°C) for 1−2 days before sowing.
- Seed priming – Soak seeds for 4−8 hours and re-dry before sowing. Seeds must be sown within 1−2 days after priming.
- Pre-germination – Submerge seeds in water for 12−24 hours or until small shoots appear at the end of the seed. In colder weather, seeds may need to be soaked for 36−48 hours. Drain and dry the seed in the bag for 24 hours in a shady area where air can circulate the bags. If bag temperatures exceed 42°C, some seeds will be damaged. Broadcast or drum seed before the roots exceed 5mm in length. When calculating the planting rate, allow for an expansion of 10-30% in seed weight.
Step 4: Sprouting.
Suggest soaking the sprouts with MicrobeBio® products that contain 100% organic nutrient-rich ingredients infused with value-added biologicals performed to be effective for the prevention and suppression of soil-borne such as nematodes and fungi.
Note: Please gently mix or blend the sprouts to limit the new root’s broken from a coleoptile.
- MicrobeBio® Vigor Shield – Apply 100g to soak or spray to the seeding. – Providing nutrient-rich ingredients infuse with value-added biologicals performed to be effective for the prevention of the nematodes.
- MicrobeBio® Vigor Guard – Apply 100g to soak or spray to the seeding – Providing nutrient-rich ingredients infuse with value-added biologicals performed to be effective for the prevention of the fungi.
WET DIRECT – SEEDING METHOD
Direct-seeding:
Direct-seeding is the most common method in Southeast Asia:
Mechanical broadcast
Horizontal direct-seeding uses mechanical sender.
- The number of sprouts: 100 – 120 kg/ha.
- Distance: the distance of each row is from 20 – 30 cm.
Note: Keep sprouts dry and do not fill over the limit of the drum. That will help the sprouts spread evenly.

Traditional broadcast
Horizontal direct-seeding uses the hand-pull seeder
The number of sprouts: 120 – 150 kg/ha.

Fertility management:

The first day of the direct-seeding (1st day)
At this time, the first application is very important.
| RECOMMENDED PRODUCTS | |
| Applying the nutrient-rich ingredients infuse with value-added biologicals performed to be effective for the prevention of the nematodes (especially a root-not disease). | |
| · MicrobeBio® Vigor Shield | Apply 1.9 kg (left – after using 100 g to treat the seeding) to treat a hectare. Note: Please carefully read the label instruction for the efficient yield. |
| Providing the nutrient-rich ingredients infuse with value-added biologicals performed to be effective for the prevention of the fungi especially the fusarium at the roots. | |
| · MicrobeBio® Vigor Guard | Apply 1.9 kg (left – after using 100 g to treat the seeding) to treat a hectare. Note: Please carefully read the label instruction for the efficient yield. |
| Applying the product that contains the best source of mineral nutrients caters to the seedings to uptake the fast-released nutrients at the first stage of the seeding. | |
| · MicrobeBio® Aqua Activator | Apply 4 liters to treat a hectare. Note: Please carefully read the label instruction for the efficient yield. |
1st Dressing Application (from day 20 to day 30 after the seeding):
This is known as one of the critical rice plant growth stages. At this time, the seeding needs full nutrients for growing. From day 20 to day 30 after the seeding, the seedlings (baby rice plants) are easily attacked by pests and fungi. Below is the list of common pests that are harmful to rice plants.
| Rice skipper or Rice leaf folder larva | Mealybug larva | Rice bug larva | Rice whorf maggot larva |
| Rice thrips larva | Spiders | Planthopper larva | Rice stem gall midge larva |
Tips: Recommended to apply the MicrobeBio® products from the first start-up to the end of the season for the efficient yield.
| RECOMMENDED PRODUCTS | |
| At the vegetative phase, the soil needs to provide the nutrient-rich ingredients infuse with value-added biologicals performed for the growth stage. | |
| · MicrobeBio® Rhizo Activator | Apply 50 kg to treat a hectare (using the spreading method). |
| Providing the nutrient-rich ingredients infuse with value-added biologicals performed to be effective for the rice plants to prevent the pests at the early stage (larva). | |
| · MicrobeBio® Vigor Ultra | Apply 2 kg to treat a hectare. Note: Please carefully read the label instruction for the efficient yield. |
| Applying the product that contains the best source of mineral nutrients caters to the seedlings to uptake the fast-released nutrients at the vegetative phase. | |
| · MicrobeBio® Aqua Activator | Apply 2 liters to treat a hectare. Note: Please carefully read the label instruction for the efficient yield. |
2nd Dressing Application (from day 50 to day 60 after seeding)
The panicle initiation of the vegetative phase is the second critical stage of the rice plant growth. The farmers should observe the rice field so that they can plan to prevent the pathogenic pests and insects at the larva stage. Furthermore, the farmers should apply nutrients to help the rice plant grow. Below is the list of common pests that are harmful to rice plants:
| Rice skipper or Rice leaf folder | Mealybug | Rice bug | Rice whorf maggot |
| Spider | Planthopper | Rice stem gall midge | Rice thrips |
Tips: Recommended to apply the MicrobeBio® products from the first start-up to the end of the season for the efficient yield.
| RECOMMENDED PRODUCTS | |
| At the vegetative phase, the soil needs to provide the nutrient-rich ingredients infuse with value-added biologicals performed for the price plants against the pathogenic fungi from the environment. | |
| · MicrobeBio® Vigor Boost | Apply 2 kg to treat a hectare. Note: Please carefully read the label instruction for the efficient yield. |
| At the vegetative phase, the soil needs to provide the nutrient-rich ingredients infuse with value-added biologicals performed for the price plants prevent the pests and insects from the environment. | |
| · MicrobeBio® Vigor Ultra | Apply 1 kg to treat a hectare. Note: Please carefully read the label instruction for the efficient yield. |
| At the vegetative phase, the soil needs to provide the nutrient-rich ingredients infuse with value-added biologicals performed for the price plants against the pathogenic fungi from the environment. | |
| · MicrobeBio® Aqua Activator | Apply 2 liters to treat a hectare. Note: Please carefully read the label instruction for the efficient yield. |
3rd Dressing Application (Applying before the anthesis stage (flowering) – if needed)
Providing some needed nutrients if needed for the rice plants up to the harvesting stage.
Weed management:
Observing frequently weeds growth of each stage prevents the nutrients deficiencies in the soil that will affect rice plant growth:
- At the 10 – 15 days after seeding: need to following and pick up the weeds left in prior to using the weed control at the land preparation.
- At the 30% – 50% ripping stage: make sure to manage weeds that will reduce the nutrients deficiencies in the soil.
- Before harvesting: make sure to control weeds to void the mix-up between weeds and rice plants while harvesting.
Water management:
There are some concerns below:
- From 1 – 3 days after seeding, the farmers need to check and control the golden apple snails completely. From 4 – 5 days after seeding, the farmers continuously flooding water into the field and increase water from 1 – 3 cm on day 10 after seeding. Keep the water levels are at 3 – 5 cm up to the seedlings present the max of panicles.
- After getting the max panicles, the farmer should drain the water in the field for a week. Starting dressing application and flooding water approx. 3 – 5 cm. Then, keep the water levels up to the milk stage.
After the milk stage, the farmers can alternate to non-floodwater and floodwater up to the hard dough stage. Keep the field dry at the maturity stage.
TRANSPLANTING METHOD
Some common transplant methods are used in tropical countries:
- Soil-bed method (Wet-bed method and Dry-bed method)
- Mat method (or tray method)
The farmers can choose one of the methods:
Wet-bed method:
Use this method in areas with sufficient water supply. Allot 1/10 of the field for the seedbed area, and prepare approximately 40 kg of seeds to transplant 1 ha of land.
- Prepare beds at 1 m wide by convenient length. Raise the soil to 5−10 cm height.
- Broadcast pre-germinated seeds in thoroughly puddled and leveled soil.
- Construct drainage canals for proper water removal.
- Add organic manure (decompose) and a small amount of inorganic fertilizer as basal dressing. This increases seed vigor and allows easier uprooting for transplanting.
- Providing the best nutrients with zinc (Zn) to support the seedling against the pathogens later.
- MicrobeBio® Vigor Shield – Apply 1 kg to treat 1 hectare of the wet-bed method. Note: Please carefully read the label instruction for the efficient yield.
- Transplant seedlings at 15−21 days old.
- Providing the best nutrients with zinc (Zn) to support the seedling against the pathogens later.
Dry-bed method:
Prepare the nursery in dry soil conditions. Ensure that the site is free of shade and has access to irrigation facilities. Allot 1/10 of the field for the seedbed area, and prepare 60−80 kg of seed to transplant 1 ha of land.
- Prepare beds at 1 m wide by convenient length. Raise the soil to 5−10 cm in height.
- Distribute a layer of half-burned paddy husk on the nursery bed to facilitate uprooting.
- Prevent moisture stress by irrigation. Without appropriate moisture, roots may be damaged during pulling.
- If nutrient supply is low, apply basal fertilizer mixture and incorporate it between rows.
- Providing the best nutrients with zinc (Zn) to support the seedling against the pathogens later.
- MicrobeBio® Vigor Shield – Apply 1 kg to treat 1 hectare of the dry-bed method. Note: Please carefully read the label instruction for the efficient yield.
- Transplant seedlings at 15−21 days old.
- Seedlings raised in dry-bed are short, strong, and have a longer root system than those raised in wet-beds.
- Providing the best nutrients with zinc (Zn) to support the seedling against the pathogens later.
Mat method:
Mat method is most appropriate for growing short-duration varieties, as seedlings experience less transplanting shock.
Compared to other methods, this requires less labor and has minimal root damage.
Prepare mat nurseries where a flat firm surface is available and water supply is very reliable. Allot 100 m2/ha or 1% of the field for the seedbed, and prepare approximately 40 − 50 kg of seed per ha.
- Mark out 1 m wide and 10−20 m long plots.
- Cover the surface with banana leaves, plastic sheets, or any flexible material from penetrating the bottom layer of the soil. Cemented floors may also be used as a base. Form the boundary with bamboo splits or banana sheath.
- Cover the seedbed with about 1 cm of burned paddy husk or compost.
- Sow pre-germinated seeds on the seedbed. Maintain a thickness of 5−6 seeds (1 kg per 1.5 m2).
- Sprinkle water to the seeds after sowing, and then press down by hand or with a wooden flat board.
- Prevent water stress by irrigation.
- Transplant seedlings at 9−14 days old.
Mat Modification (Only recommended information):
The modified mat nursery uses less land and requires fewer seeds and inputs (i.e., fertilizer and water). Allot 100 m2/ha for the seedbed, and prepare 18−25 kg of good quality seeds.
- Cover the surface of 4 cm layer soil mix with banana leaves, plastic sheets, or any flexible material from penetrating the bottom layer of the soil.
- Sow pre-germinated seeds on the seedbed, then sprinkle with water. Maintain a thickness of 2−3 seeds.
- Water the nursery 2 times a day for 5 days.
- Transplant seedlings at 15−21 days old, when seedlings reach the four-leaf stage.
PREPARING BEFORE TRANSPLANTING:
Suggestion: before transplanting, dipping roots for the seedling so that the root will have a coast of the nutrient-rich ingredients infuse with value-added biologicals microorganisms that help rice plants to prevent pathogenic diseases from fungi and pests.
Recommended products:
- MicrobeBio® Vigor Shield – Apply 100g for dipping roots – Providing nutrient-rich ingredients infuse with value-added biologicals performed to be effective for the prevention of the nematodes.
- MicrobeBio® Vigor Guard – Apply 100g for dipping root – Providing nutrient-rich ingredients infuse with value-added biologicals performed to be effective for the prevention of the
Recommended transplanting distance:
For the transplanting: (1 – 2 flake/bush): 30 kg/ha
- Transplanting distance: 25 – 30 cm
- Average bush/m2: 35 – 45 bush/m2
Please always preparing extra seedling in case the short seedlings that the transplanting.
THE FERTILITY MANAGEMENT FOR THE TRANSPLANTING:

The first day of the transplanting(1st day)
At this time, the first application is very important.
| RECOMMENDED PRODUCTS | |
| Applying the nutrient-rich ingredients infuse with value-added biologicals performed to be effective for the prevention of the nematodes (especially a root-not disease). | |
| · MicrobeBio® Vigor Shield | Apply 1.9 kg (left – after using 100 g to treat the seeding) to treat a hectare. Note: Please carefully read the label instruction for the efficient yield. |
| Providing the nutrient-rich ingredients infuse with value-added biologicals performed to be effective for the prevention of the fungi especially the fusarium at the roots. | |
| · MicrobeBio® Vigor Guard | Apply 1.9 kg (left – after using 100 g to treat the seeding) to treat a hectare. Note: Please carefully read the label instruction for the efficient yield. |
| Applying the product that contains the best source of mineral nutrients caters to the seedings to uptake the fast-released nutrients at the first stage of the seeding. | |
| · MicrobeBio® Aqua Activator | Apply 4 liters to treat a hectare. Note: Please carefully read the label instruction for the efficient yield. |
1st Dressing Application (from day 10 to day 20 after the transplanting):
This is known as one of the critical rice plant growth stages. At this time, the seeding needs full nutrients for growing. From day 10 to day 20 after the transplanting, the baby rice plants are easily attacked by pests and fungi. Below is the list of common pests that are harmful to rice plants.
| Rice skipper or Rice leaf folder larva | Mealybug larva | Rice bug larva | Rice whorf maggot larva |
| Spiders | Planthopper larva | Rice stem gall midge larva | Rice thrips larva |
Tips: Recommended to apply the MicrobeBio® products from the first start-up to the end of the season for the efficient yield.
| RECOMMENDED PRODUCTS | |
| At the vegetative phase, the soil needs to provide the nutrient-rich ingredients infuse with value-added biologicals performed for the growth stage. | |
| · MicrobeBio® Rhizo Activator | Apply 50 kg to treat a hectare (using the spreading method). |
| Providing the nutrient-rich ingredients infuse with value-added biologicals performed to be effective for the rice plants to prevent the pests at the early stage (larva). | |
| · MicrobeBio® Vigor Ultra | Apply 2 kg to treat a hectare. Note: Please carefully read the label instruction for the efficient yield. |
| Applying the product that contains the best source of mineral nutrients caters to the seedlings to uptake the fast-released nutrients at the vegetative phase. | |
| · MicrobeBio® Aqua Activator | Apply 2 liters to treat a hectare. Note: Please carefully read the label instruction for the efficient yield. |
2nd Dressing Application (from day 40 to day 50 after the transplanting)
The panicle initiation of the vegetative phase is the second critical stage of the rice plant growth. The farmers should observe the rice field so that they can plan to prevent the pathogenic pests and insects at the larva stage.
Furthermore, the farmers should apply nutrients to help the rice plant grow. Below is the list of common pests that are harmful to rice plants:
| Rice skipper or Rice leaf folder | Mealybug | Rice bug | Rice whorf maggot |
| Spider | Planthopper | Rice stem gall midge | Rice thrips |
Tips: Recommended to apply the MicrobeBio® products from the first start-up to the end of the season for the efficient yield.
| RECOMMENDED PRODUCTS | |
| At the vegetative phase, the soil needs to provide the nutrient-rich ingredients infuse with value-added biologicals performed for the price plants against the pathogenic fungi from the environment. | |
| · MicrobeBio® Vigor Boost | Apply 2 kg to treat a hectare. Note: Please carefully read the label instruction for the efficient yield. |
| At the vegetative phase, the soil needs to provide the nutrient-rich ingredients infuse with value-added biologicals performed for the price plants prevent the pests and insects from the environment. | |
| · MicrobeBio® Vigor Ultra | Apply 1 kg to treat a hectare. Note: Please carefully read the label instruction for the efficient yield. |
| At the vegetative phase, the soil needs to provide the nutrient-rich ingredients infuse with value-added biologicals performed for the price plants against the pathogenic fungi from the environment. | |
| · MicrobeBio® Aqua Activator | Apply 2 liters to treat a hectare. Note: Please carefully read the label instruction for the efficient yield. |
3rd Dressing Application (Applying before the anthesis stage (flowering) – if needed)
Providing some needed nutrients if needed for the rice plants up to the harvesting stage.
Weed management:
Observing frequently weeds growth of each stage prevents the nutrients deficiencies in the soil that will affect rice plant growth:
- At the 10 – 15 days after seeding: need to following and pick up the weeds left in prior to using the weed control at the land preparation.
- At the 30% – 50% ripping stage: make sure to manage weeds that will reduce the nutrients deficiencies in the soil.
- Before harvesting: make sure to control weeds to void the mix-up between weeds and rice plants while harvesting.
Water management:
- Transplanting(0 – 7 days after the transplanting): non-floodwater before transplanting and keep the field dry in 3 days. On day 4, flooding water to cover the field in 1 day and draining to keep the field surface having enough moisture.
- Vegetative phase (7 – 42 after the transplanting): keep water levels should be around 3 – 5 cm initially. At this time, changing the water in the field from 2 – 3 times. After each time changing water, keep the field drain for 2 – 3 days.
- Reproductive phase (42 – 65 after the transplanting): Keep the water level at 3 – 5 cm.
- Maturity (69 – 95 after the transplanting): gradually increase to 5−10 cm (with increasing plant height) and remain there until the field is drained 7−10 days before harvest.
III. HARVESTING
- Choose the dry day for the harvesting.
- Store the rice seed in a dry environment.
- Pay attention to the rodent attack while storing the rice seeds.
WET DIRECT – SEEDING METHOD + PRODUCTS SUMMARY

| PRODUCTS | GERMINATION AND 1ST DAY | 1ST DRESSING | 2ND DRESSING | 3RD DRESSING |
| MICROBEBIO® VIGOR SHIELD | Apply 100g to soak or spray on the the seed.
Apply 1.9 kg to treat 1 hectare |
|||
| MICROBEBIO® VIGOR GUARD | Apply 100g to soak or spray on the the seed.
Apply 1.9 kg to treat 1 hectare |
|||
| MICROBEBIO® VIGOR ULTRA | Apply 2 kg to treat 1 hectare | Apply 1 kg to treat 1 hectare | Optional | |
| MICROBEBIO® VIGOR BOOST | Apply 2 kg to treat 1 hectare | Optional | ||
| MICROBEBIO® AQUA ACTIVATOR | Apply 4 liters to treat 1 hectare | Apply 2 liters to treat 1 hectare | Apply 4 liters to treat 1 hectare | |
| MICROBEBIO® RHIZO ACTIVATOR | Apply 50 kg to treat 1 hectare | Optional |